The file below has a run down of the bow and arrow parts along with a description of how to shoot.
The following sequence of figures shows the basic steps of shot execution.
Although it is depicted as a sequence of separate events, you should execute these steps in one single smooth motion.
Also keep in mind that these are Basic steps, individual adjustments are possible, but these are usually given by the instructor / trainer / coach.
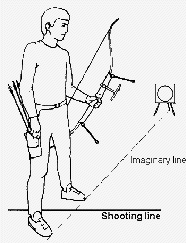
1 – Stance
Put the tip of your toes against an imaginary straight line towards the centre of the target.
Put your feet on both sides of the line.
Put your feet about shoulder’s width apart.
Try and relax.
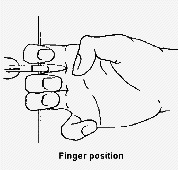
2 – Finger Placement
Place your fingers in such a way, that you hold the string with your index finger above the nock and middle and ring finger under the nock.
Hook the string between first and second joint. Make sure to maintain a deep hook.

3 – Bow hand placement
The pressure of the bow should be distributed along the pressure line.
Relax your fingers. The back of your hand should make an angle of 45 degrees.
The tips of thumb and index finger are may touch each other in a relaxed way.

4 – Extending the bow arm
Bring the bow arm to shoulder height.
The elbow of the bow arm is turned away from the string.
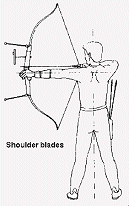
5 – Drawing the bow
Draw the string along the bow arm in a straight horizontal line to the anchor point.
Draw with your back muscles, moving the shoulder blades towards each other.
Stand straight up and relaxed.
Keep both shoulders as low as possible.

6 – Anchoring
The string should touch the middle of the chin.
The index finger is placed under the chin.
Keep your teeth together.
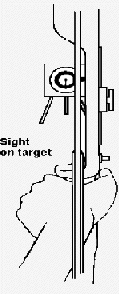
7 – Aiming
Aiming is done with the dominant eye. Shut the other eye.
Keep the sight at the target.
Keep the string a little left of the sight.
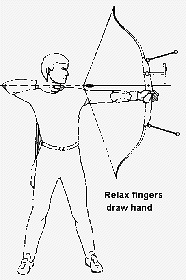
8 – Release
Keep pulling the shoulder blades towards each other, while relaxing the fingers of the draw hand.
A relaxed bow hand will automatically move backwards.
Relax your bow hand. Let the bow drop.
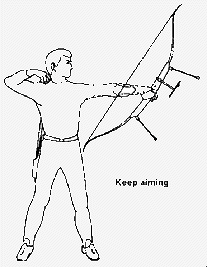
9 – Follow-Through
The draw hand should be relaxed and near or behind your ear.
Keep aiming until after the arrow hits the target.
